Using Custom Tags
Learn how to use tags within the super.AI platform to group data points.
Tags allow you to label and group your data points for later reference. Once you’ve added tags, you can use them to filter and download your data points in the dashboard.
Here are some examples of what you can use tags for:
- Separate different batches of data you upload
- Group data points by characteristics (e.g., photos that were taken at night)
- Mark data points that need special attention (e.g., when reviewing your results)
How to add tags when you submit a data point
- Head to the super.AI dashboard
- Open the relevant project
- Click Upload data in the sidebar
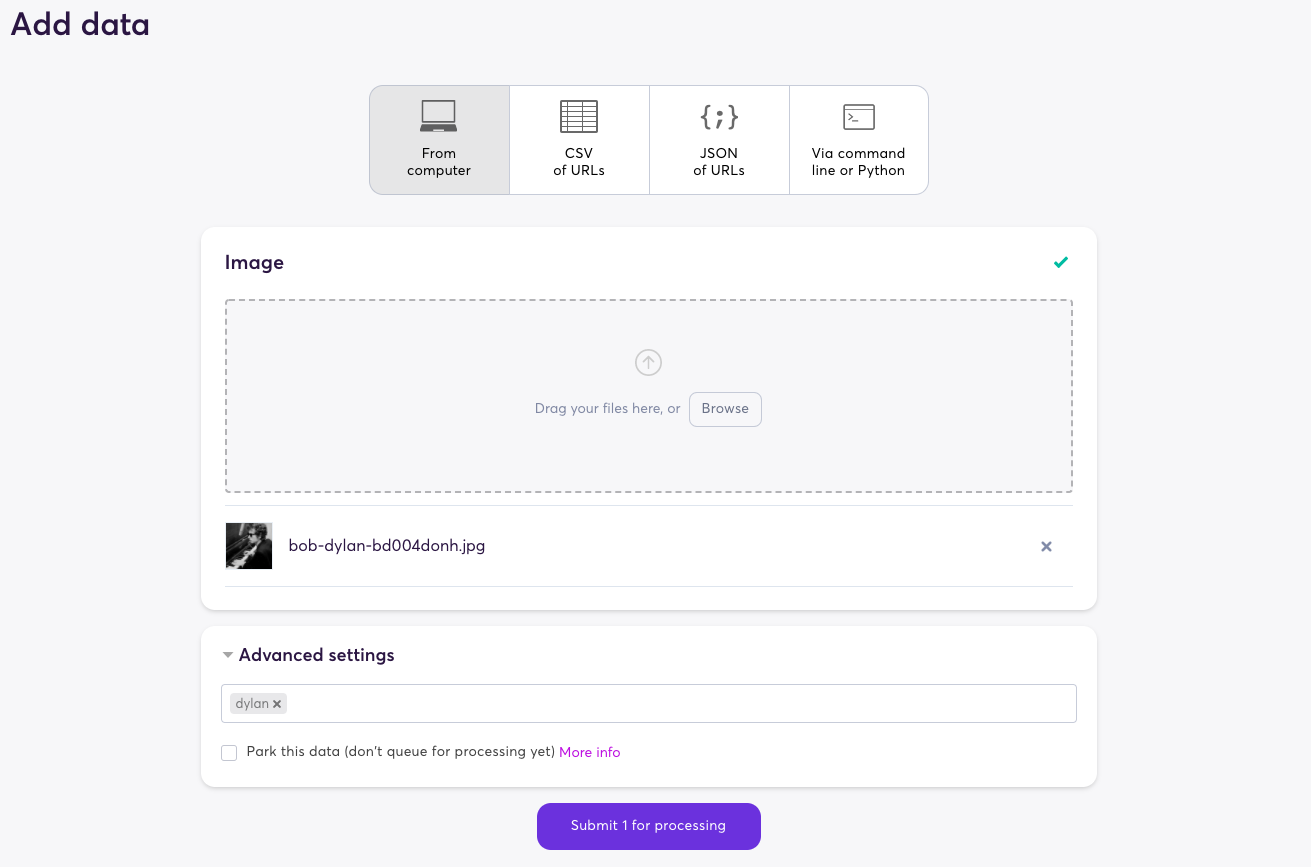
- Click on the Advanced settings section to expand it
- Type the desired tag name and press enter. You can add multiple tags by continuing to type tag names and press enter after each tag name is complete.

The Add data screen with the Advanced settings options expanded
How to add tags to a single previously submitted data point
- Head to the super.AI dashboard
- Open the relevant project
- Bring up the details card for your data point by clicking on its row in the work queue
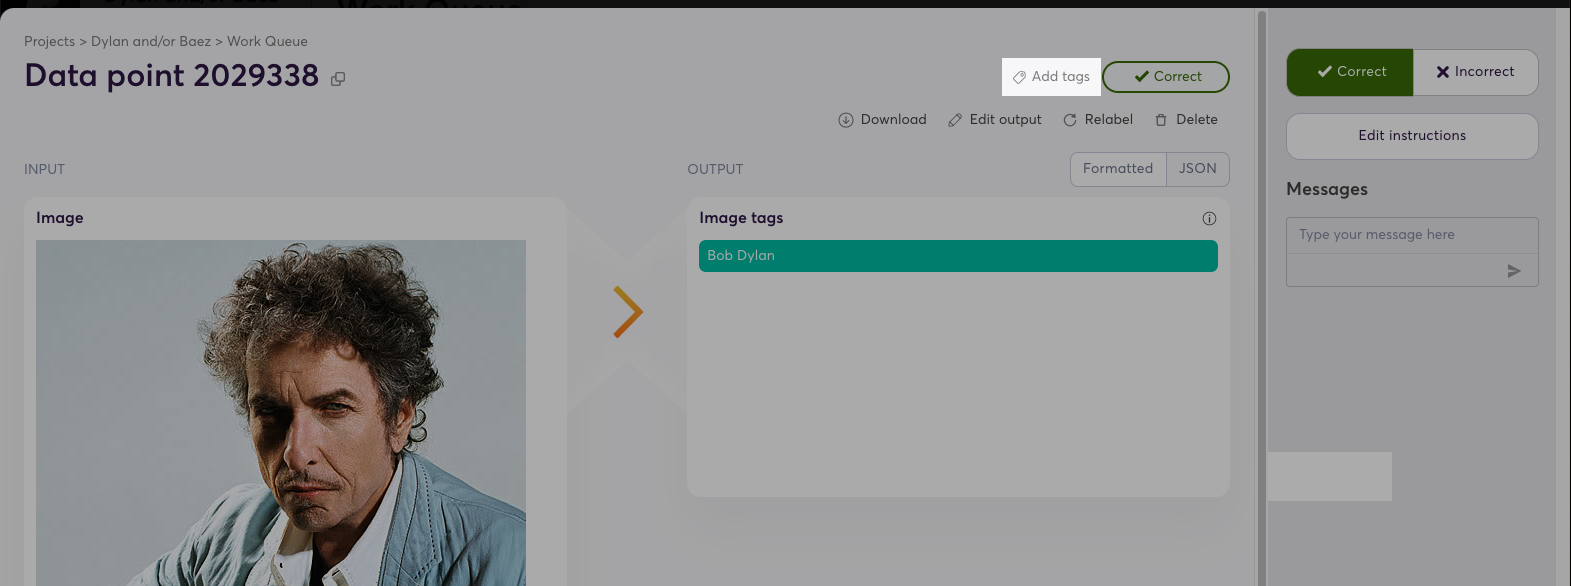
- Towards the top right of the card, click
 Add tags or, if the data point already has tags, click the edit (pencil) button that appears when you hover over the tags
 - Enter your desired tags, pressing enter after each tag name is complete
- Click outside the tag input element to make it disappear

A data points details card with the Add tags button highlighted
How to add tags to multiple previously submitted data points
- Head to the super.AI dashboard
- Open the relevant project
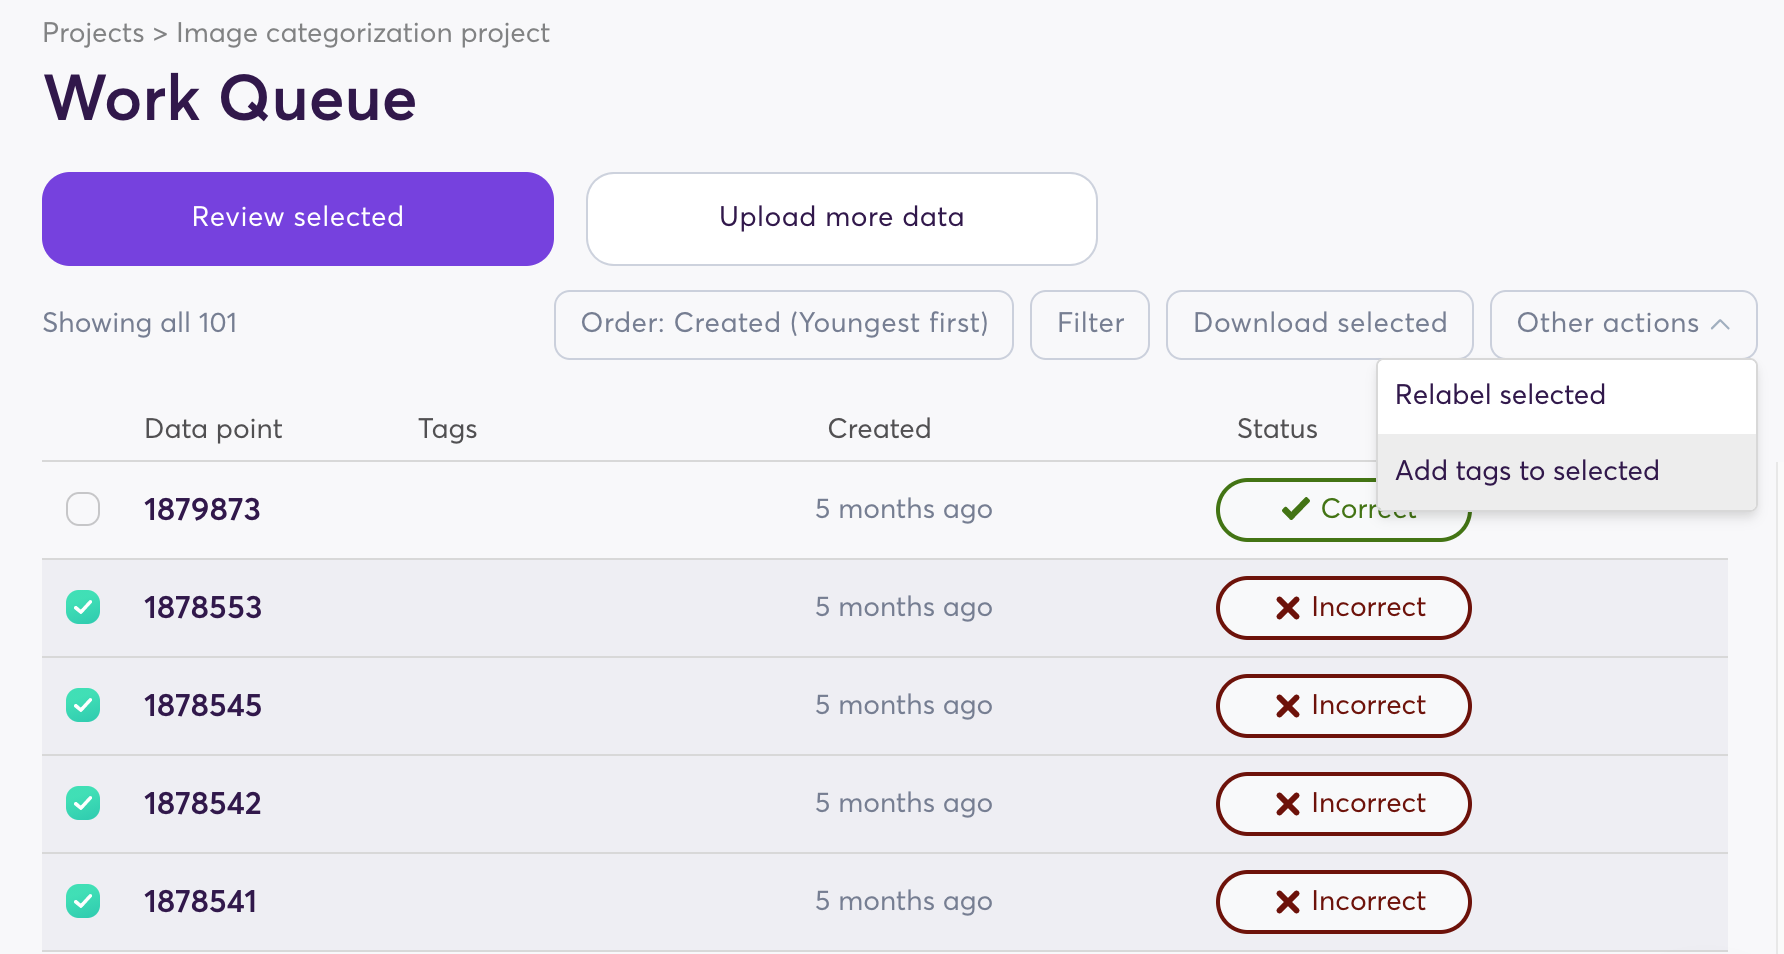
- Select one or more data points in the work queue using the checkboxes on the left side of the queue. If you want to add tags to all the data points currently displayed in your work queue, you do not need to select them all; just move onto the next step.
- Expand the Other actions drop-down menu
- Click Add tags to selected or Add tags to all
- Enter your desired tags, pressing enter after each tag name is complete
- Click Add[x] tags

The work queue with multiple data points selected and the Add tags to selected option highlighted
How to filter by tags for review and download
If you want to review or download data points based on specific tags, you can click on a tag in the Tags column of your work queue to filter based on your selection. Otherwise, filtering by tags works in the same way as any other filter and can be accessed from the Filter button at the top right of the work queue. For more information on how to use filters, see our How to filter data points for review and download page.
Updated 5 months ago
