Image segmentation labeling interface
The super.AI labeling interface for image segmentation features a selection of tools that help you segment images accurately and quickly. Below, you can learn in detail about each labeling tool and see a list of all the keyboard shortcuts available when using the image instance segmentation labeling interface.
Overview

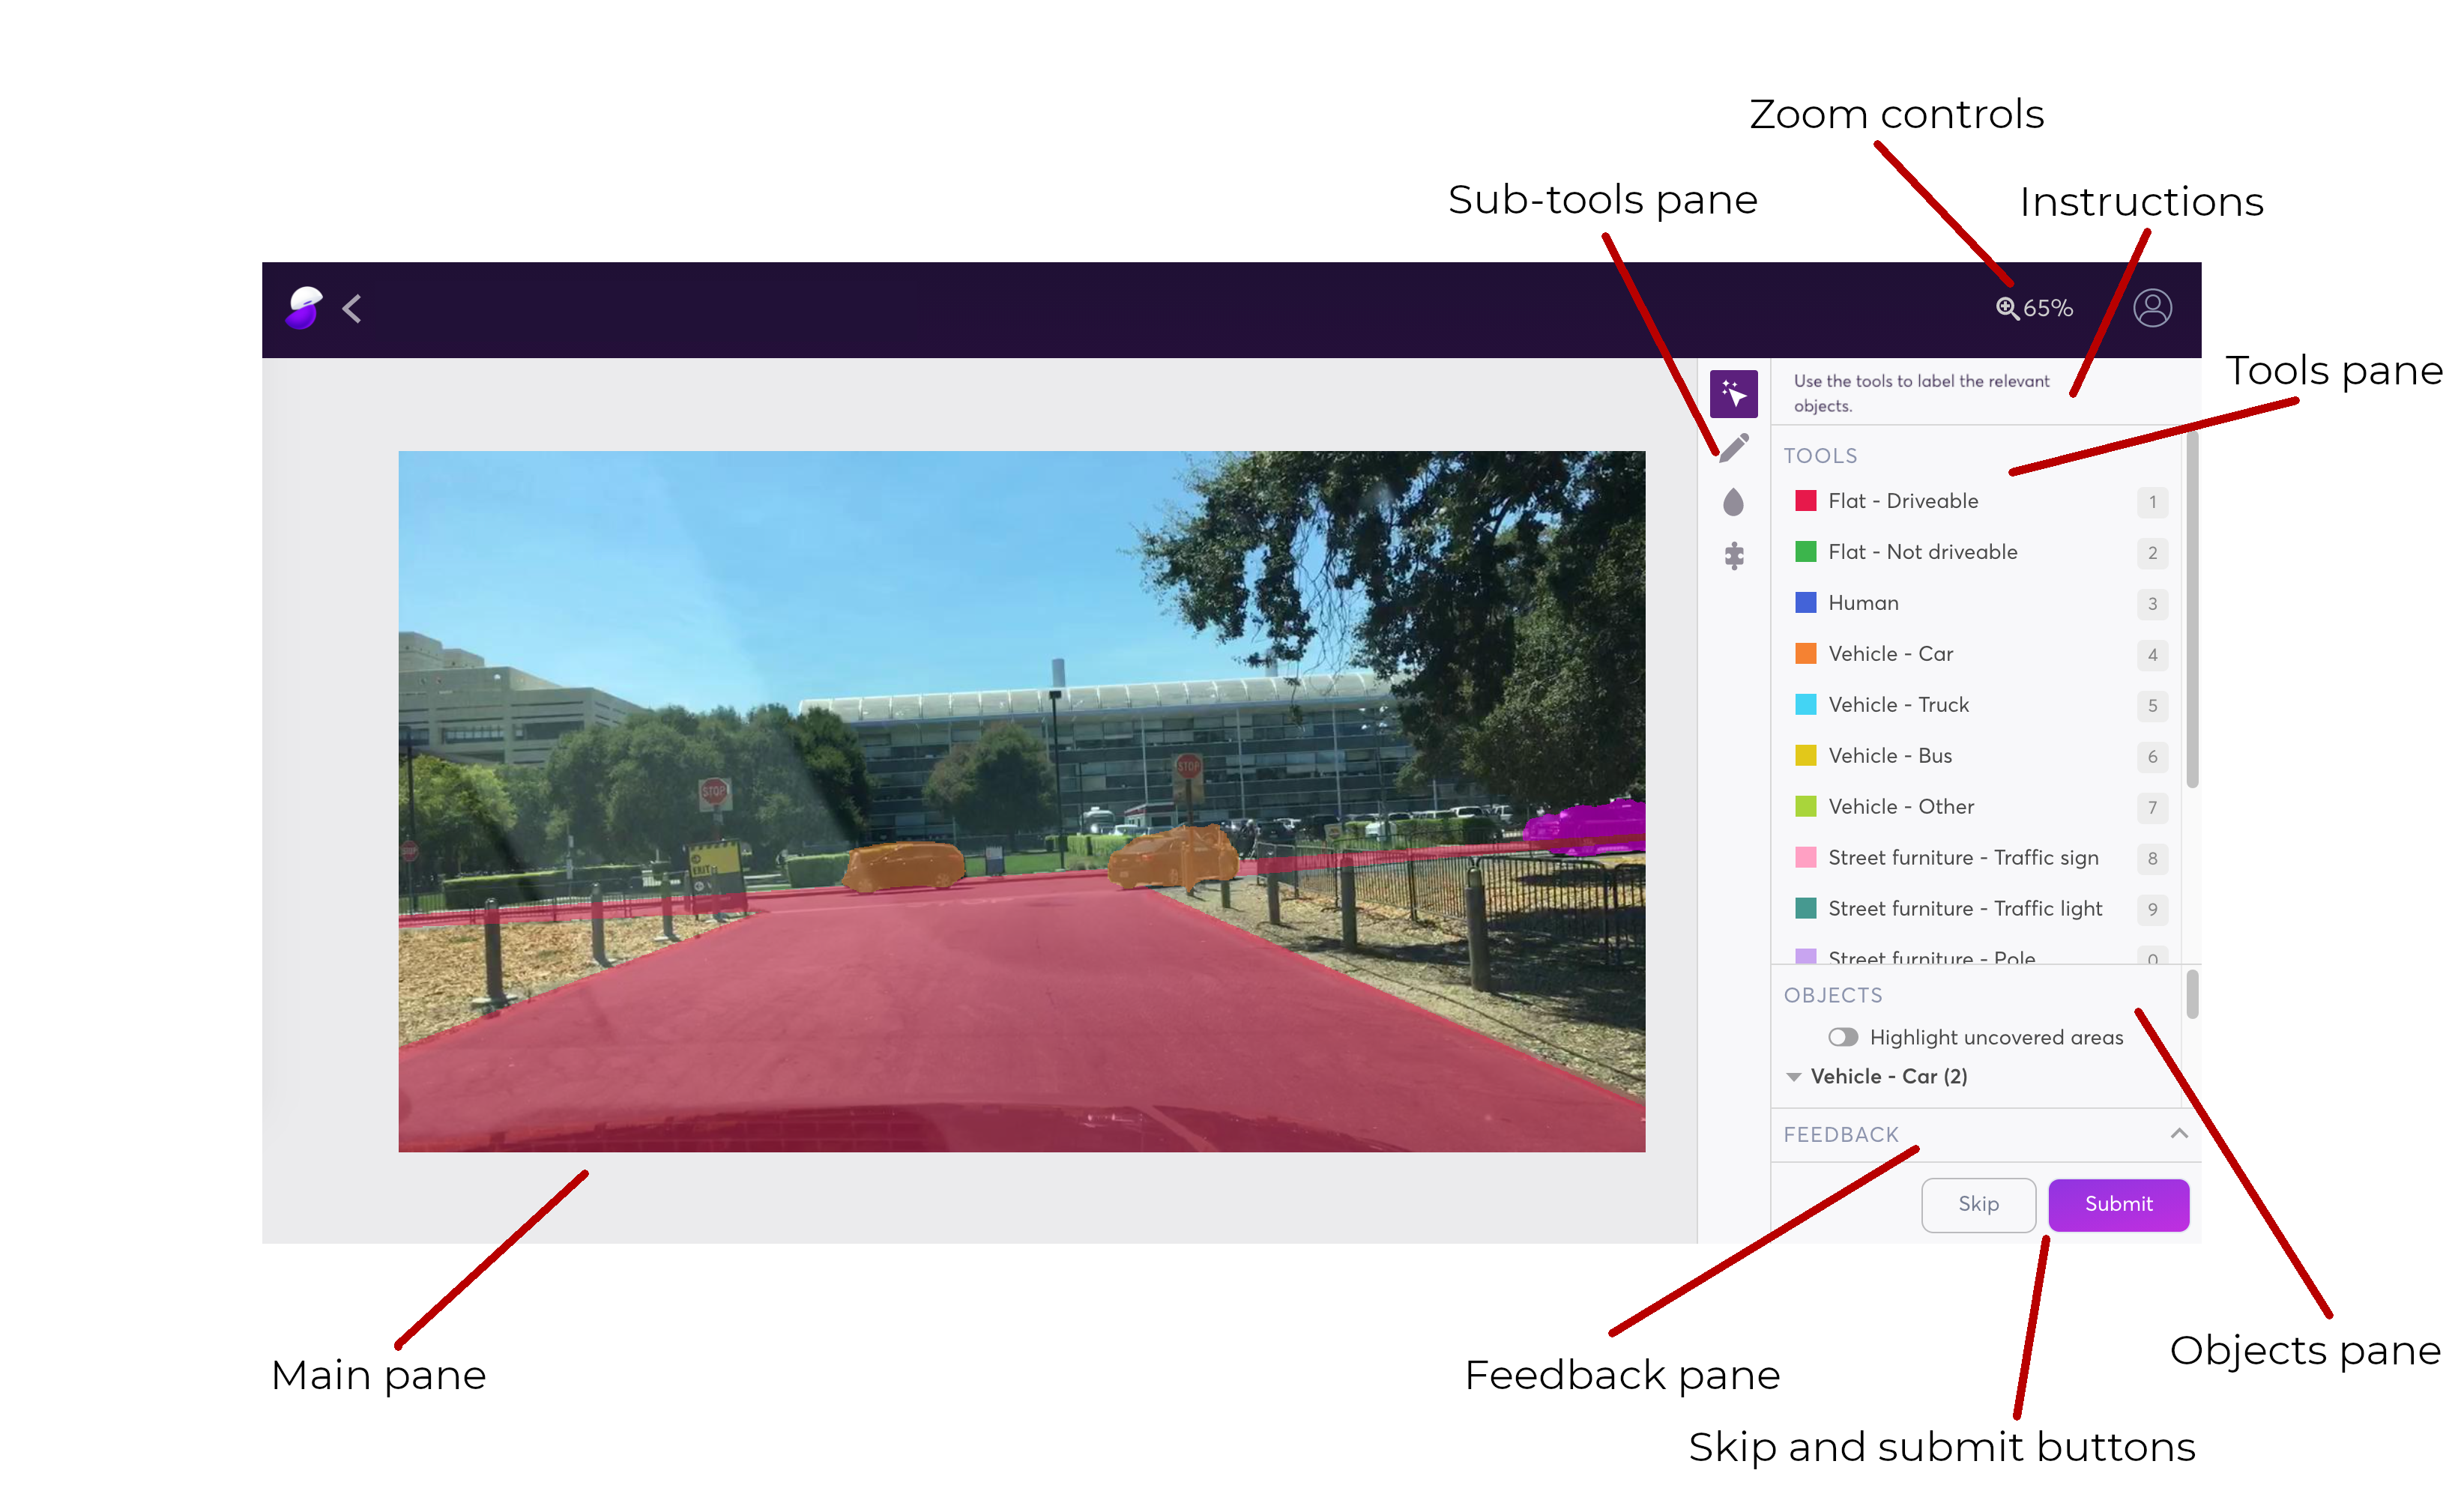
The image segmentation labeling interface with the key areas labeled
Getting started
Choose a tool from the tools pane in the top right, then choose a sub-tool. Use the sub-tool to create a shape. You can learn about each of the sub-tools in the labeling sub-tools section. Once you have completed creating a shape using a sub-tool, a corresponding object will appear in the objects pane in the lower right.
If you create another shape, it will get added to the currently selected object by default. To create a new object, click on the tool again before starting to use it.
Once you have fully segmented the image, you can click Submit at the lower right.
Zooming and panning
There are several options for controlling the zoom:
- Press cmd/ctrl and the
+and-keys on your keyboard - Hold
Zand click your mouse to zoom in and hold alt +Zand click to zoom out - Click
 Zoom at the top right of the interface and use the slider to adjust the zoom level
There are also options to Fit (shift + 1), which will adjust the image to fit entirely within the main pane, and Actual size (shift + Z), which will display the image at its natural resolution.
You can pan the image by clicking and dragging in the main pane or by using the scrollers on your mouse.
Labeling sub-tools
 Auto-segmentation
 Auto-segmentation
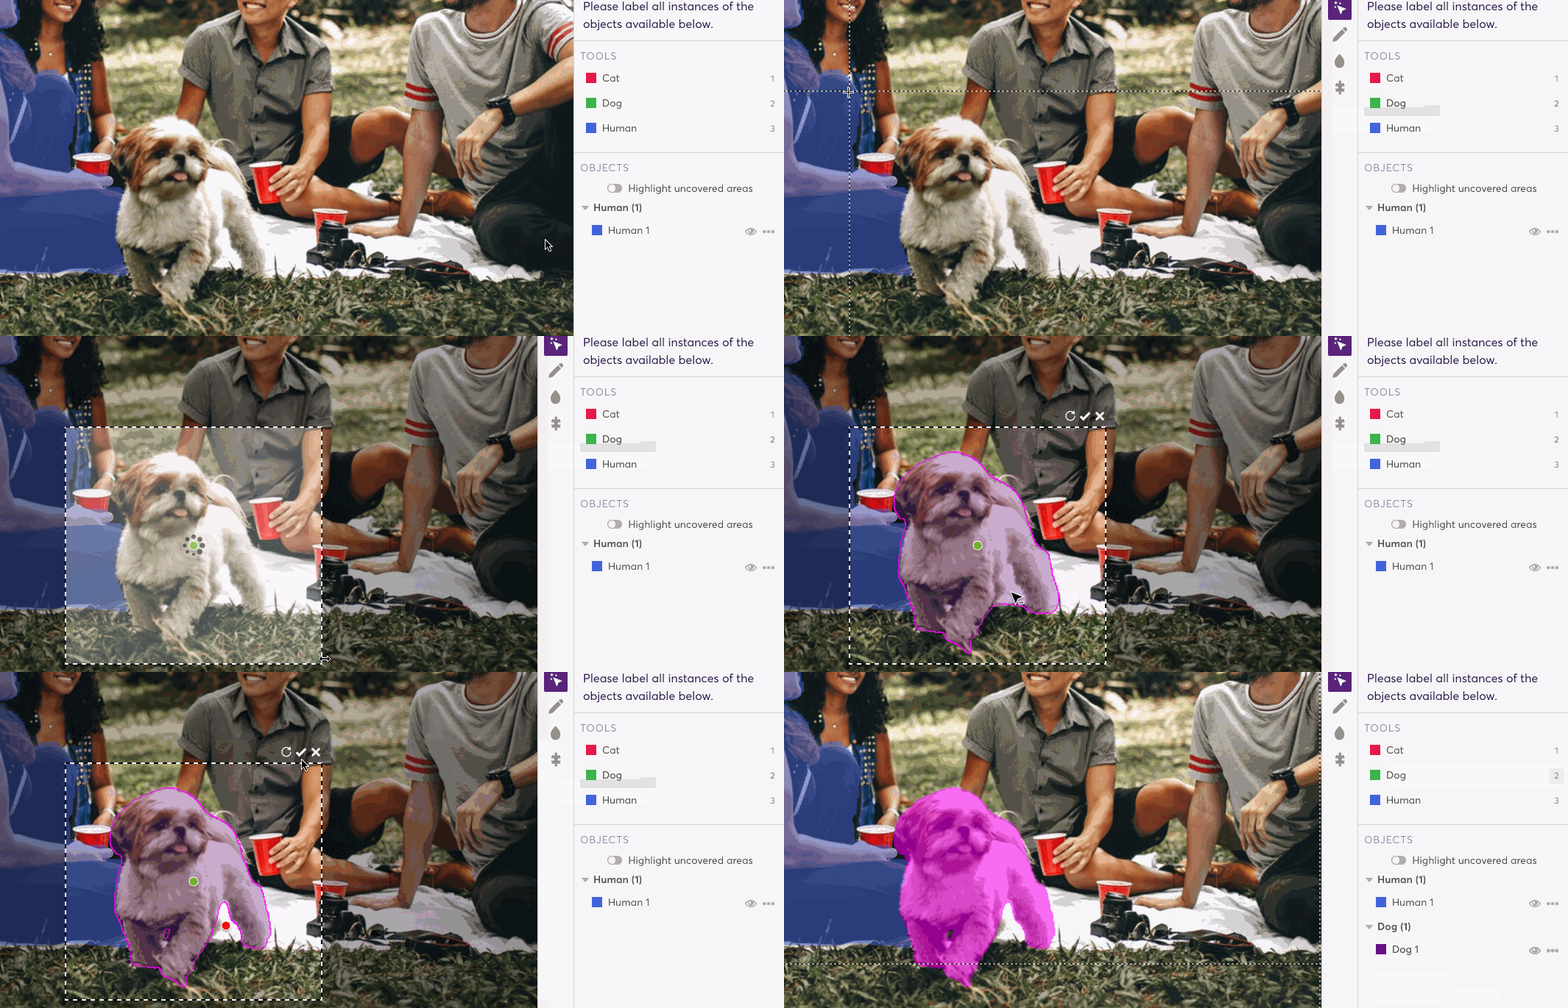
Auto-segmentation brings machine learning to your toolkit. Here’s how to use it:
- Select the auto-segmentation sub-tool
- Draw a box over any object in the image, leaving some space around it
- A machine learning model applies a mask to the object it detects within the box
- Make alterations to the mask if necessary:
- Click outside the mask (but still within the box you drew) to add that area to the mask
- Click within the mask to remove that area from the mask
- Recalculate the mask at any time by clicking
 Reload
- Once you’re happy with the mask, you can click
 Confirm at the top of the box. Otherwise, you can cancel the mask by clicking
  Cancel .

An animation showing how to use the auto-segmentation tool
 Pen
Pen
 Pen
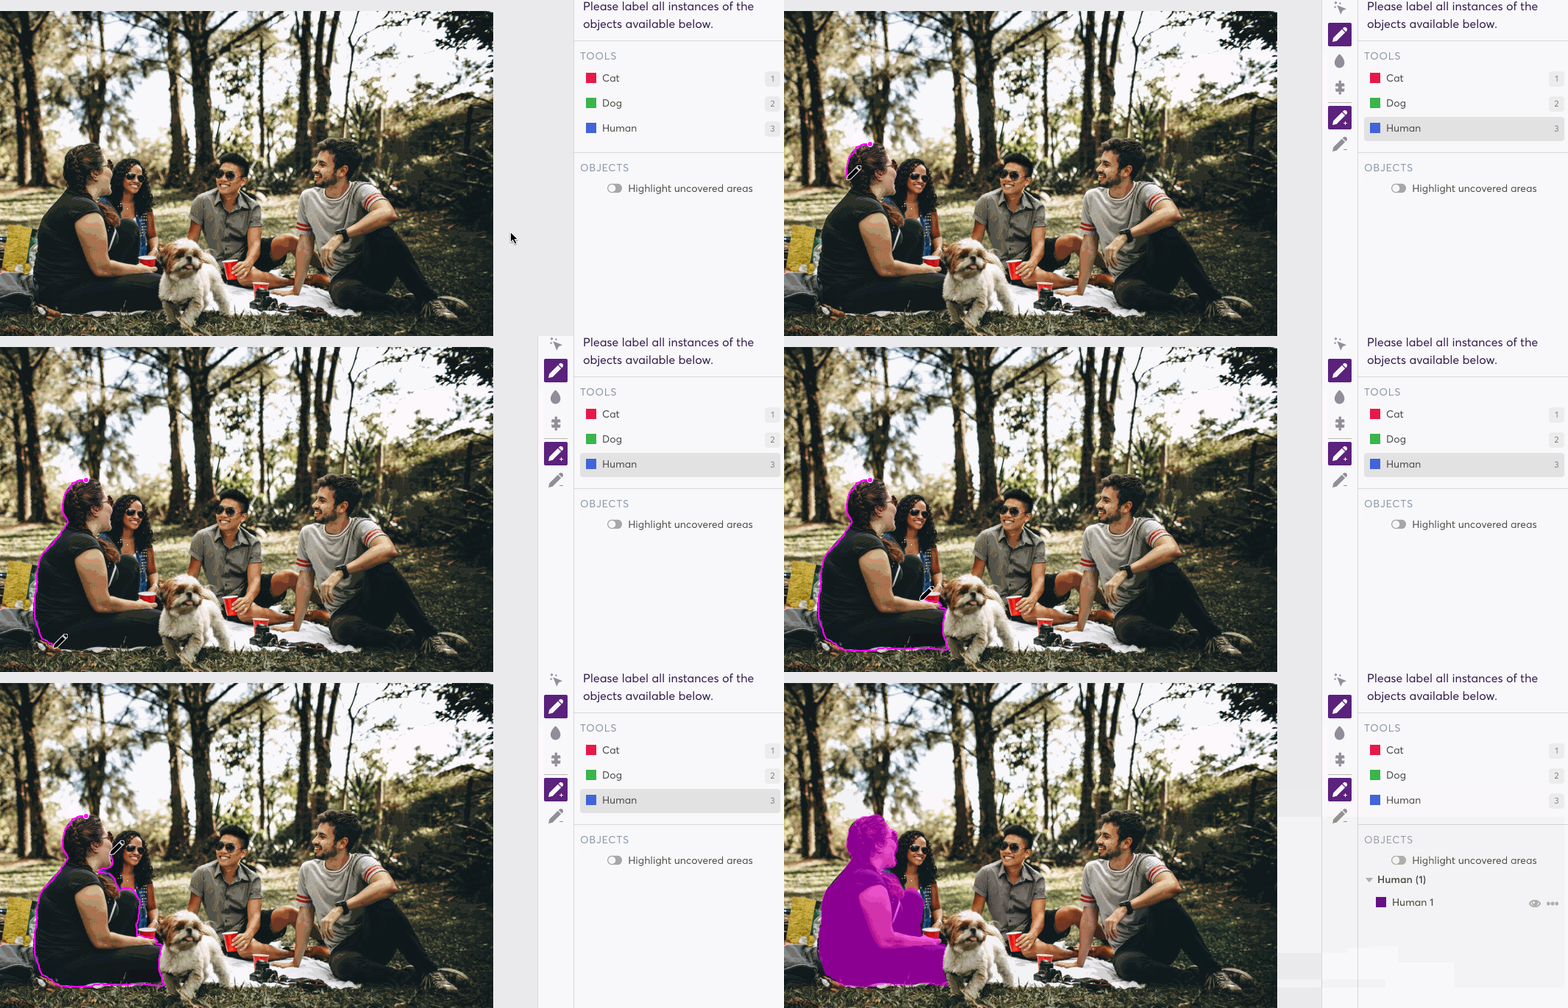
PenUse the pen to outline objects by connecting a series of lines or by freehand drawing around objects. You can draw a series of lines by clicking, releasing, moving the cursor and clicking again, then repeating this action. You will need to join the final line to the starting point to complete the outline. Click and hold while you move the cursor to freedraw. Just release the button when you’re done.

An animation showing how to label an object
Select the  Pen erase sub-tool to erase previously covered areas (including those created with other tools).
 Fill
Fill
 Fill
FillUse the fill to cover groups of unlabeled pixels in the image. Just click on an unlabeled area and all contiguous unlabeled pixels will be filled.
 Superpixel
 Superpixel
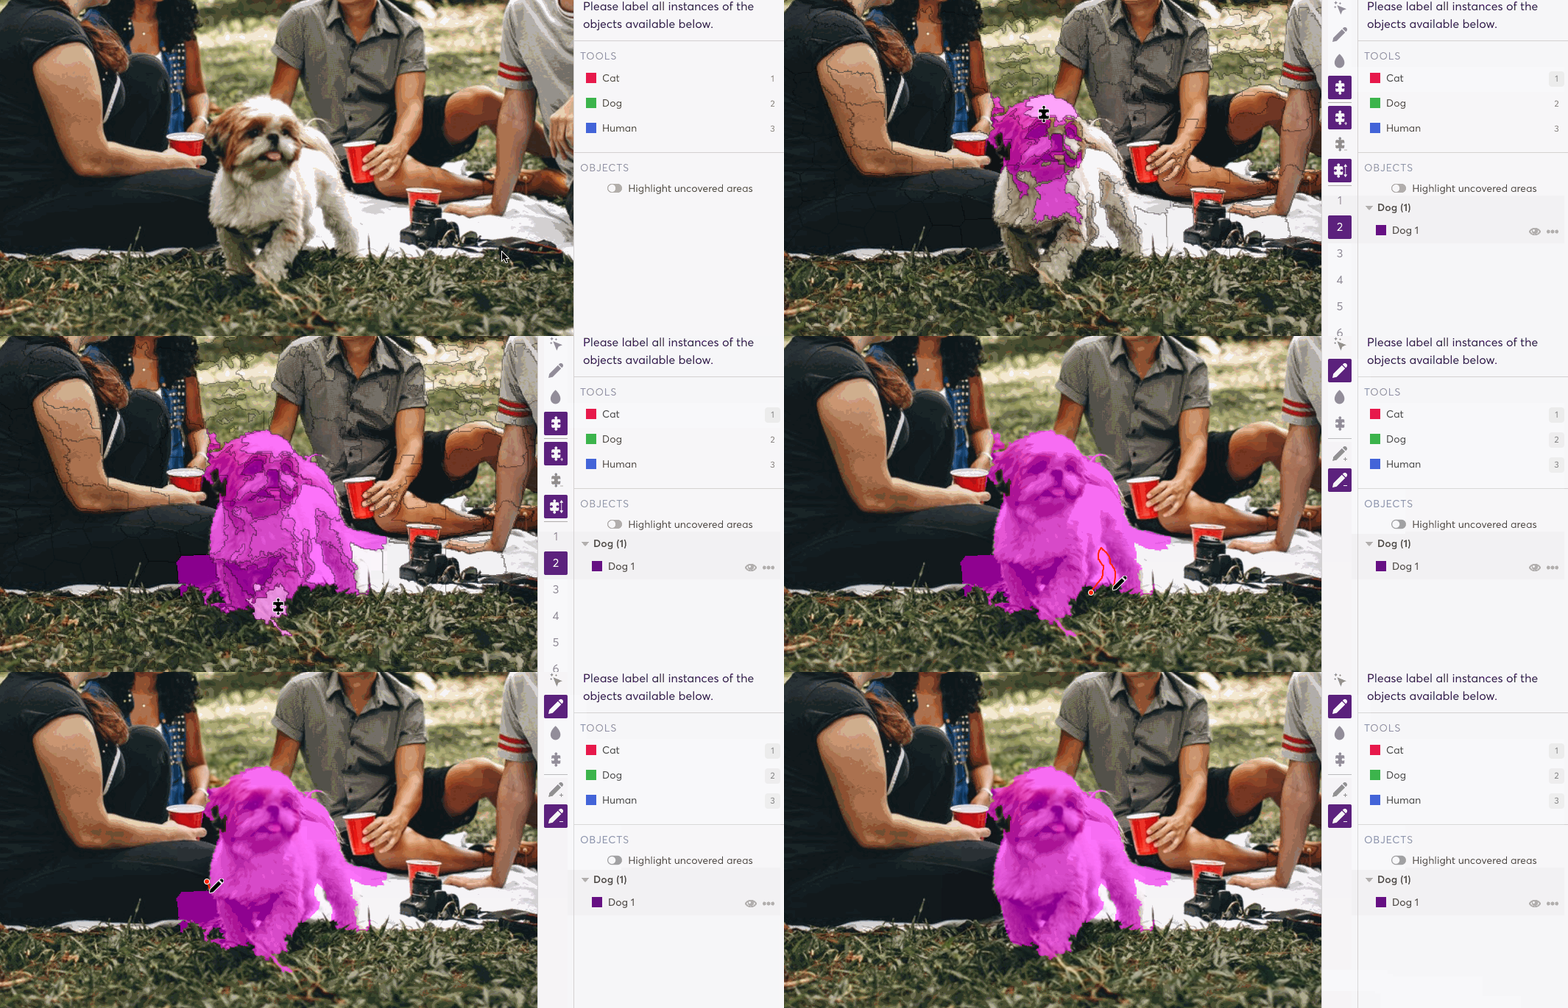
The superpixel sub-tool intelligently groups similar pixels together for you, based on changes in colour and contrast. Breaking the image up into chunks this way helps you to label more quickly—you can fill complex objects just by clicking on a couple of superpixels. You can then add or remove detail using the pen sub-tool afterwards (if necessary).

An animation showing how to use the superpixel tool
Select the  Superpixel erase sub-tool to erase previously selected areas.
You can adjust the size of the superpixels that the tool generates using the [ and ] keyboard shortcuts (or by clicking  Superpixel scale ). The higher the number you select, the larger the superpixels generated.
Changing object classes
If you have labeled an object using the wrong class, you can change it any time: just select the object and press C on your keyboard (or click on  to the right of the object in the objects pane and click Change class) and choose the correct class from the list.
Hiding and deleting objects
Hide an object from view by selecting the object and pressing H on your keyboard (or by clicking  Hide besides any object in the objects pane). Hiding objects is useful if there are overlapping objects in the main pane that make it difficult to accurately select, adjust, and create new entities.
Delete an object by pressing delete/backspace on your keyboard with the object selected (or by clicking  next to an object in the objects pane).
Highlighting uncovered areas
To see what areas you have not yet segmented, you can use the Highlight uncovered areas toggle in the objects pane in the lower right of the interface. Any pixels not yet segmented will flash red until you toggle this setting off.
Leaving feedback
You can leave feedback on your current task using the F keyboard shortcut (or by clicking Feedback at the lower right of the screen). Once in the feedback pane, you can select a feedback type and leave a brief description of the problem.
If you decide to Skip the task (see the skip section for details) you will need to leave feedback.
Skipping tasks
You can click Skip at the lower right of the labeling interface to skip tasks that are not possible to complete, whether due an input data problem, ambiguous or incomplete instructions, or any other reason. You will be prompted to provide a reason for skipping. Just select a feedback type and enter a brief description of the problem before clicking Confirm skip.
Autosave
Tasks that you are working on in the labeling interface autosave after 5 seconds of inactivity to protect against lost progress. It's possible to disable this feature by expanding the  Options menu and sliding the Save draft automatically toggle off.
Keyboard shortcuts
You can view the available keyboard shortcuts at any time within the labeling interface by pressing the ? key on your keyboard.
Action | Shortcut |
|---|---|
Submit task | Cmd/ctrl + A |
Skip task | Cmd/ctrl + J |
Open/close feedback pane | F |
Select a feedback option (when in feedback pane) | 0–9 |
Zoom image in |
|
Zoom image out | Cmd/ctrl + |
Zoom image to fit | Shift + 1 |
Zoom image to actual size | Shift + 0 |
Pan image | Shift + click and drag |
Undo | Cmd/ctrl + Z |
Redo | Cmd/ctrl + shift + Z |
Select a tool | 1–9, Q, W, E, R, etc. |
Deselect tool | Esc |
Delete selected object | Delete/backspace |
Change class of selected object | C |
Updated 5 months ago
