Editing Tables
Learn in detail how to create, delete, add, and remove rows, columns, and cells from tables.
In this article you will learn:
- How to access the Table Editor
- How to edit the layout of a table
- How to add and remove rows
- How to add and remove columns
- How to merge cells
- How to merge and split tables
- How to assign or change a table-key to/for a table
- How to add a table
Our Table Editor features will streamline your workflow when dealing with table structures. Forget about manually retyping or copy-pasting values from documents – it's energy-draining and time-consuming.
How to access the Table Editor
Our Document AI detects most table structures out of the box. However, not all tables are equal and there are occasions you want to let a human fix the table structure to extract all relevant data.
The Table Editor can be accessed in a Human in the loop (HITL) task or by a Reviewer who opens a data point directly from the Work Queue:
- Open a data point by clicking on it in the Work Queue
- Click ‘Edit Output’
- In order to edit the table structure you need to right click in a given cell to see the available options - see figure below
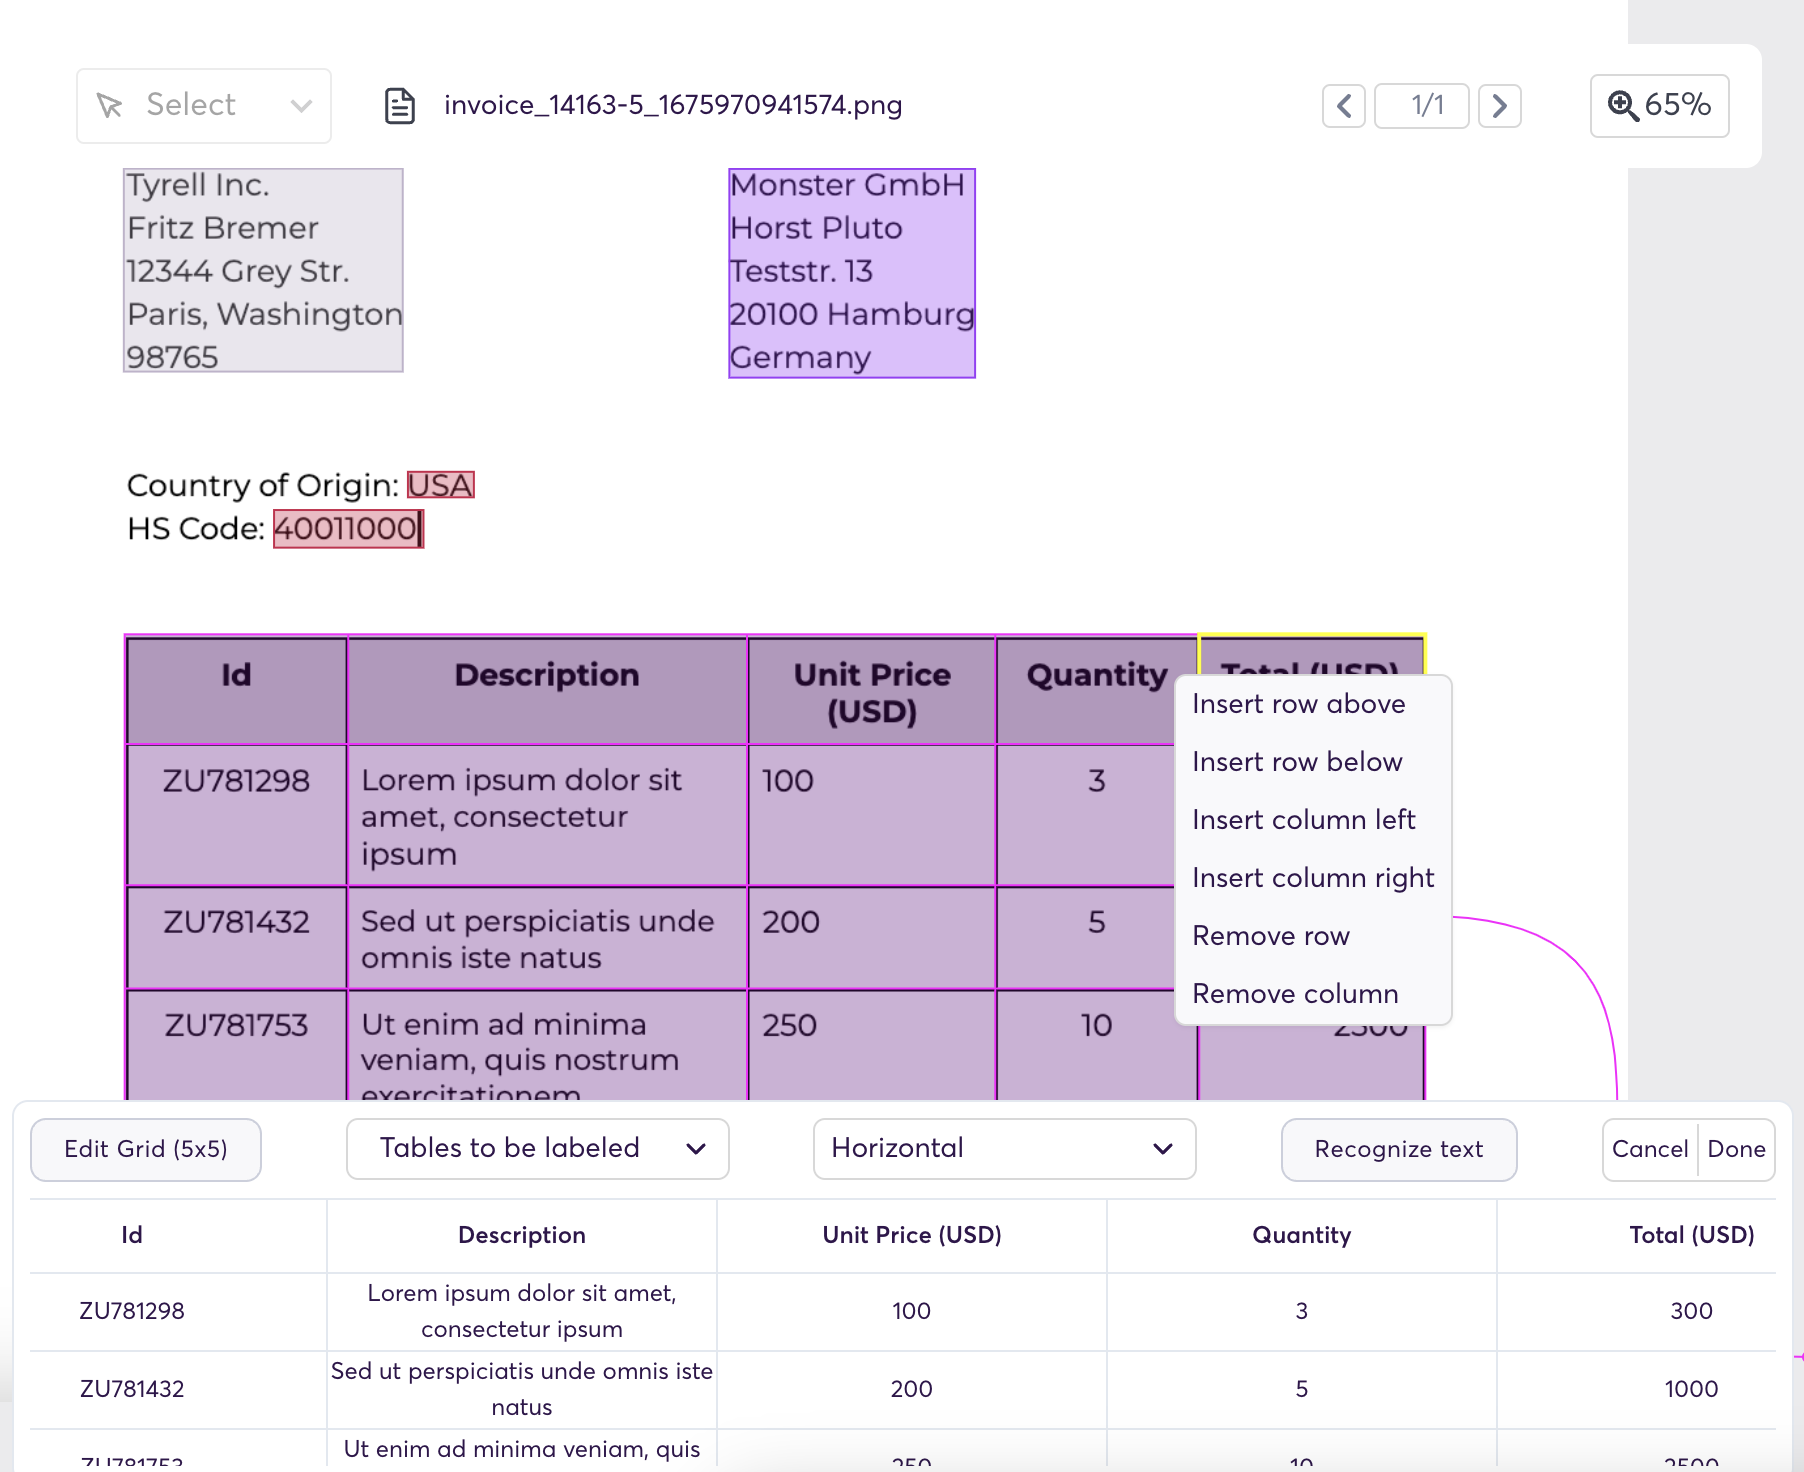
Table Editor showing context menu for editing table structure
How to edit the layout of a table
In case you want to edit the layout of a table you can
- adjust the grid in terms of the number of columns and/or rows by clicking "grid" and choosing the correct number of columns and rows
- adjust the grid layout by placing the pink lines according to the original table grid.
After that, you click "recognize text" to fill/adjust the content of the table automatically.
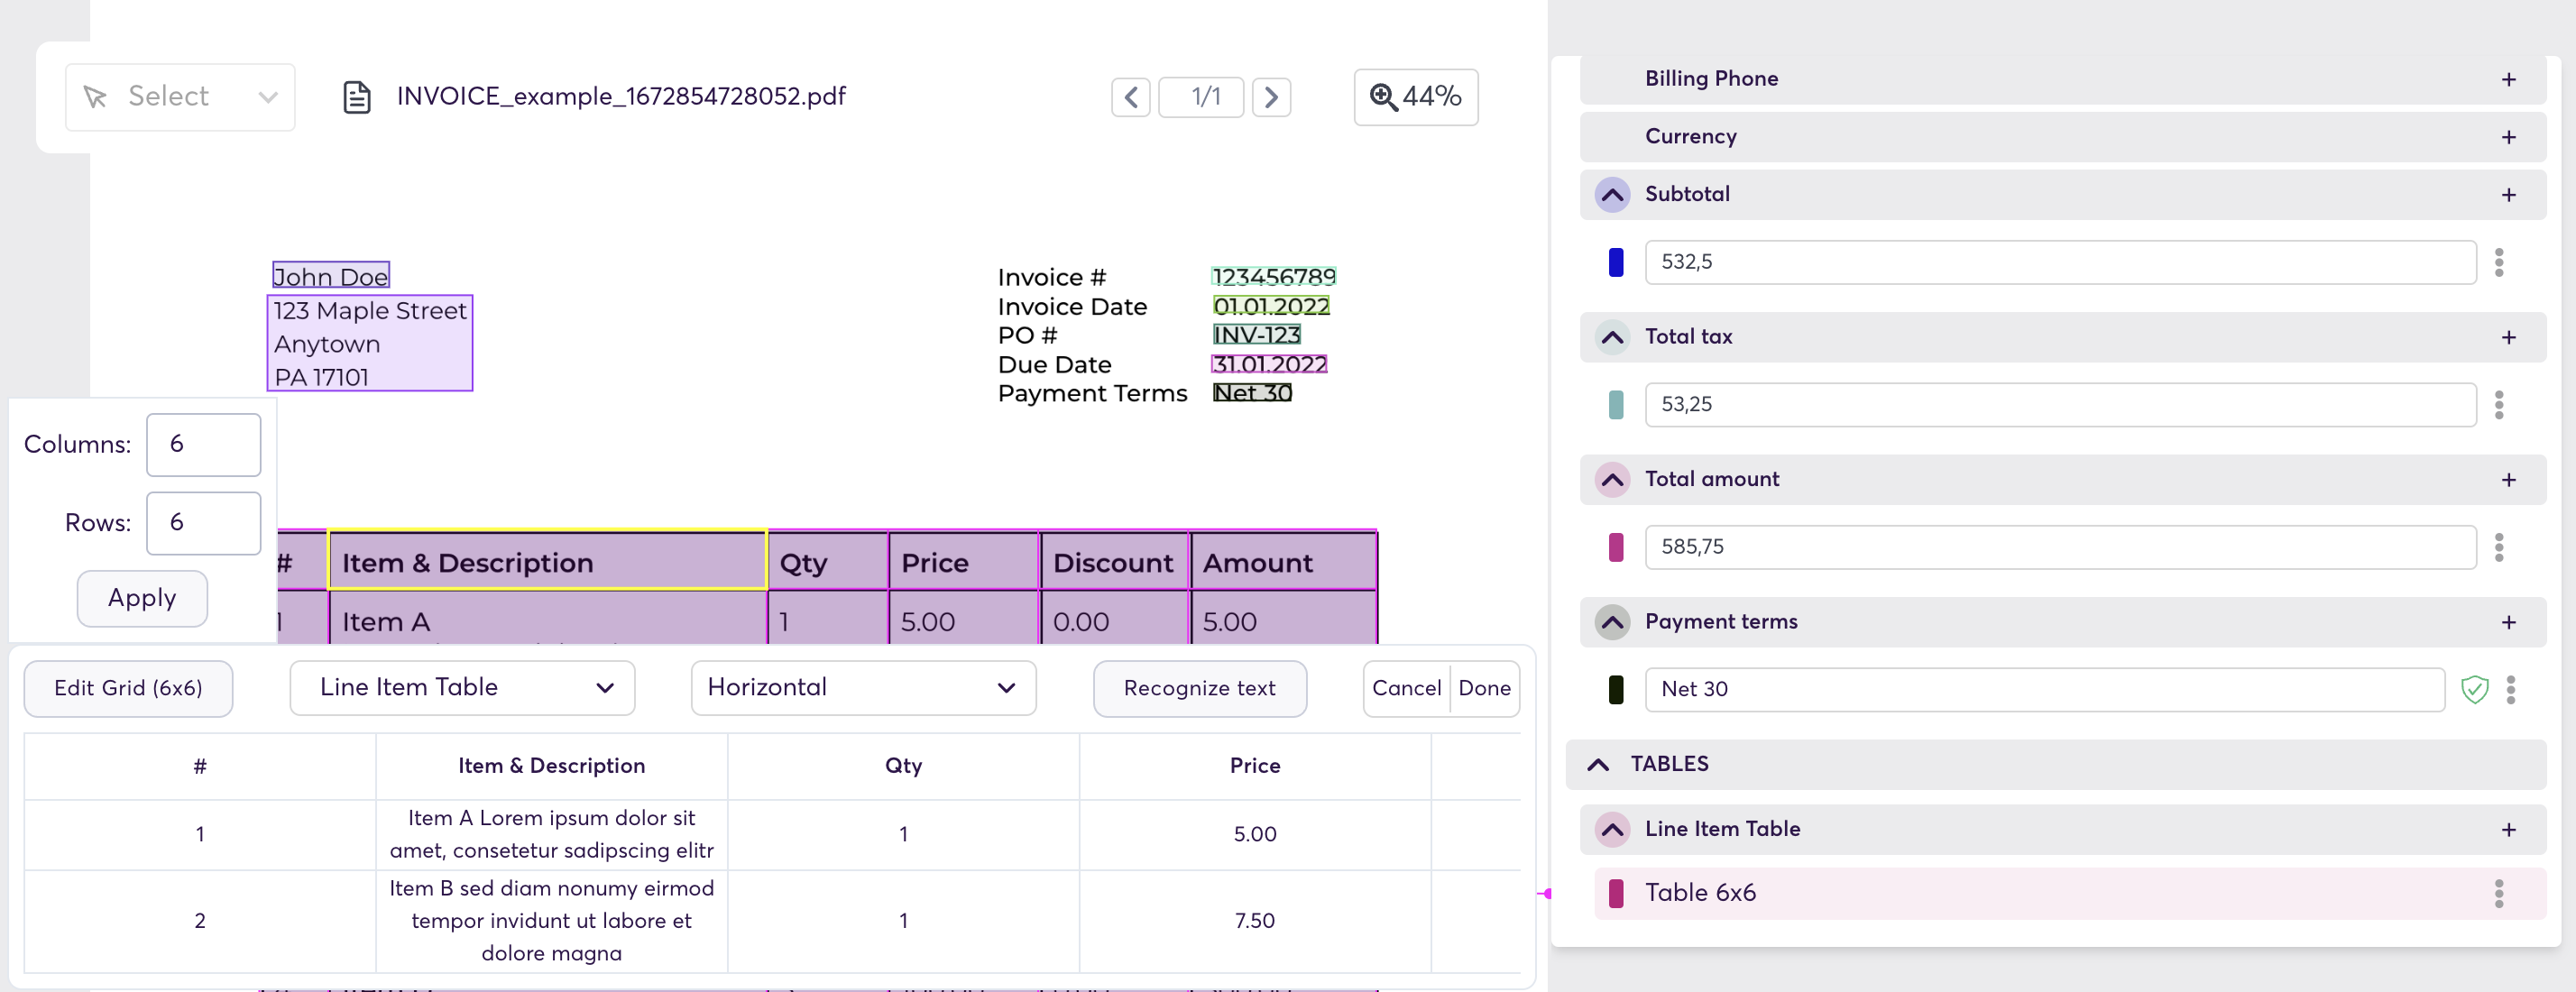
edit the layout and number of columns & rows of a table
How to add / remove rows
In order to remove an (empty) row from your table:
- Right click in any cell in that row
- Select ‘Remove row’
- Click ‘Done’
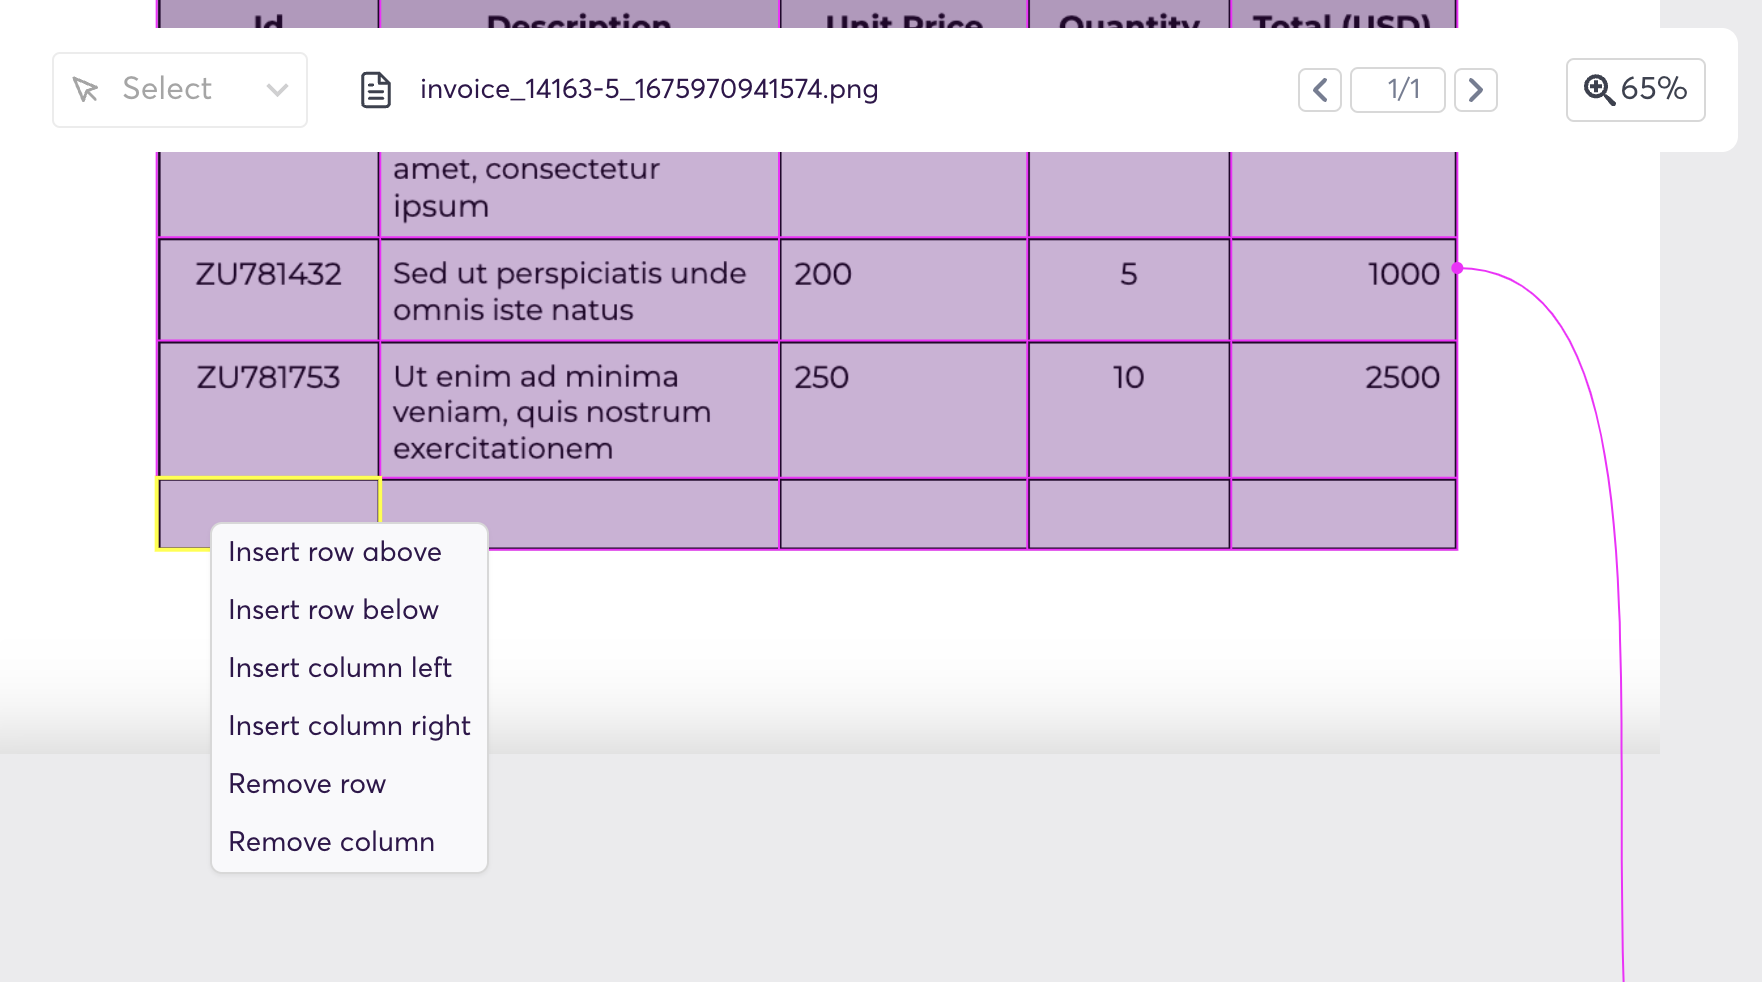
Removing a row with the Table Editor
Vice versa, in order to add a row:
- Right click in any cell of a row to add a row next to it
- Select ‘Insert row below’ or ‘Insert row above’ to add a row
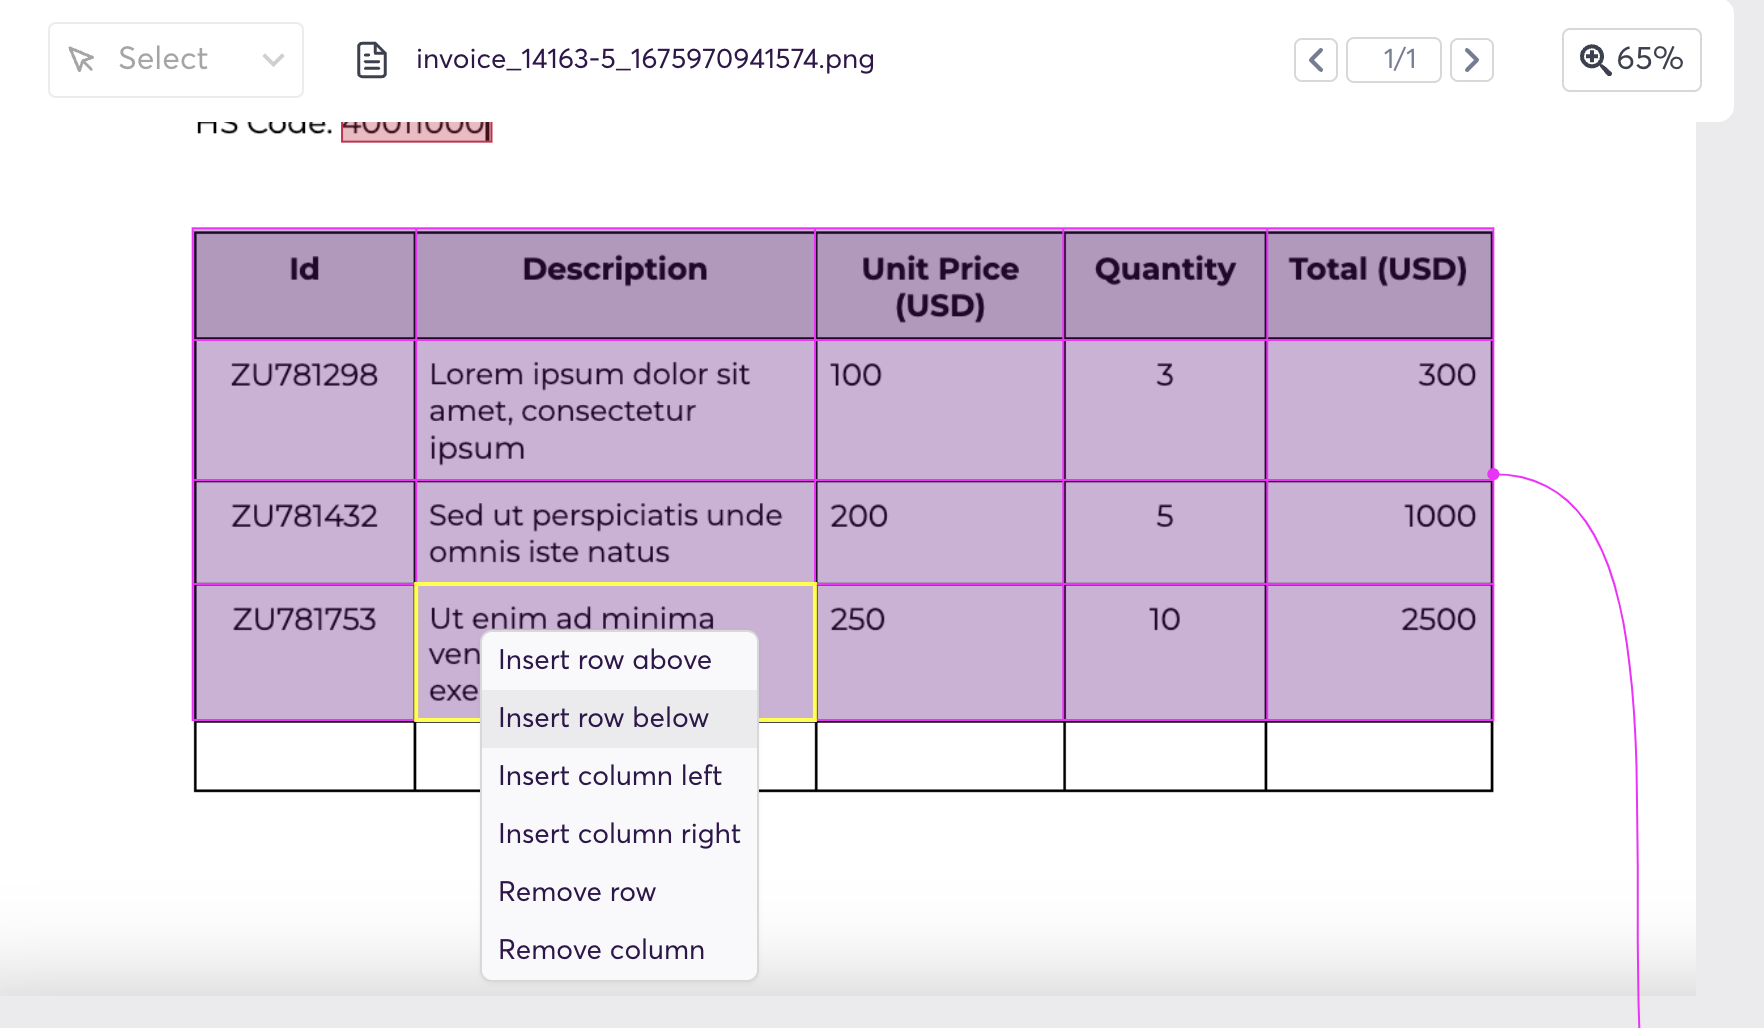
Adding a row
How to add / remove columns
In order to remove a column from your table:
- Right click in any cell in a given column
- Select ‘Remove column’
- Click ‘Done’
Vice versa, in order to add a column:
- Right click in any cell of a column to add a column next to it
- Select ‘Insert column left’ or ‘Insert column right’ to add a column
How to merge cells
In some cases the table designs span multiple rows or columns and you want to merge cells in order to extract data accordingly.
- Click into a cell that you want to merge with another one
- Hold Command key (Mac) and click the cell next to the former cell that you want to merge
- Right click into one of the cells and select ‘Merge selected cells’
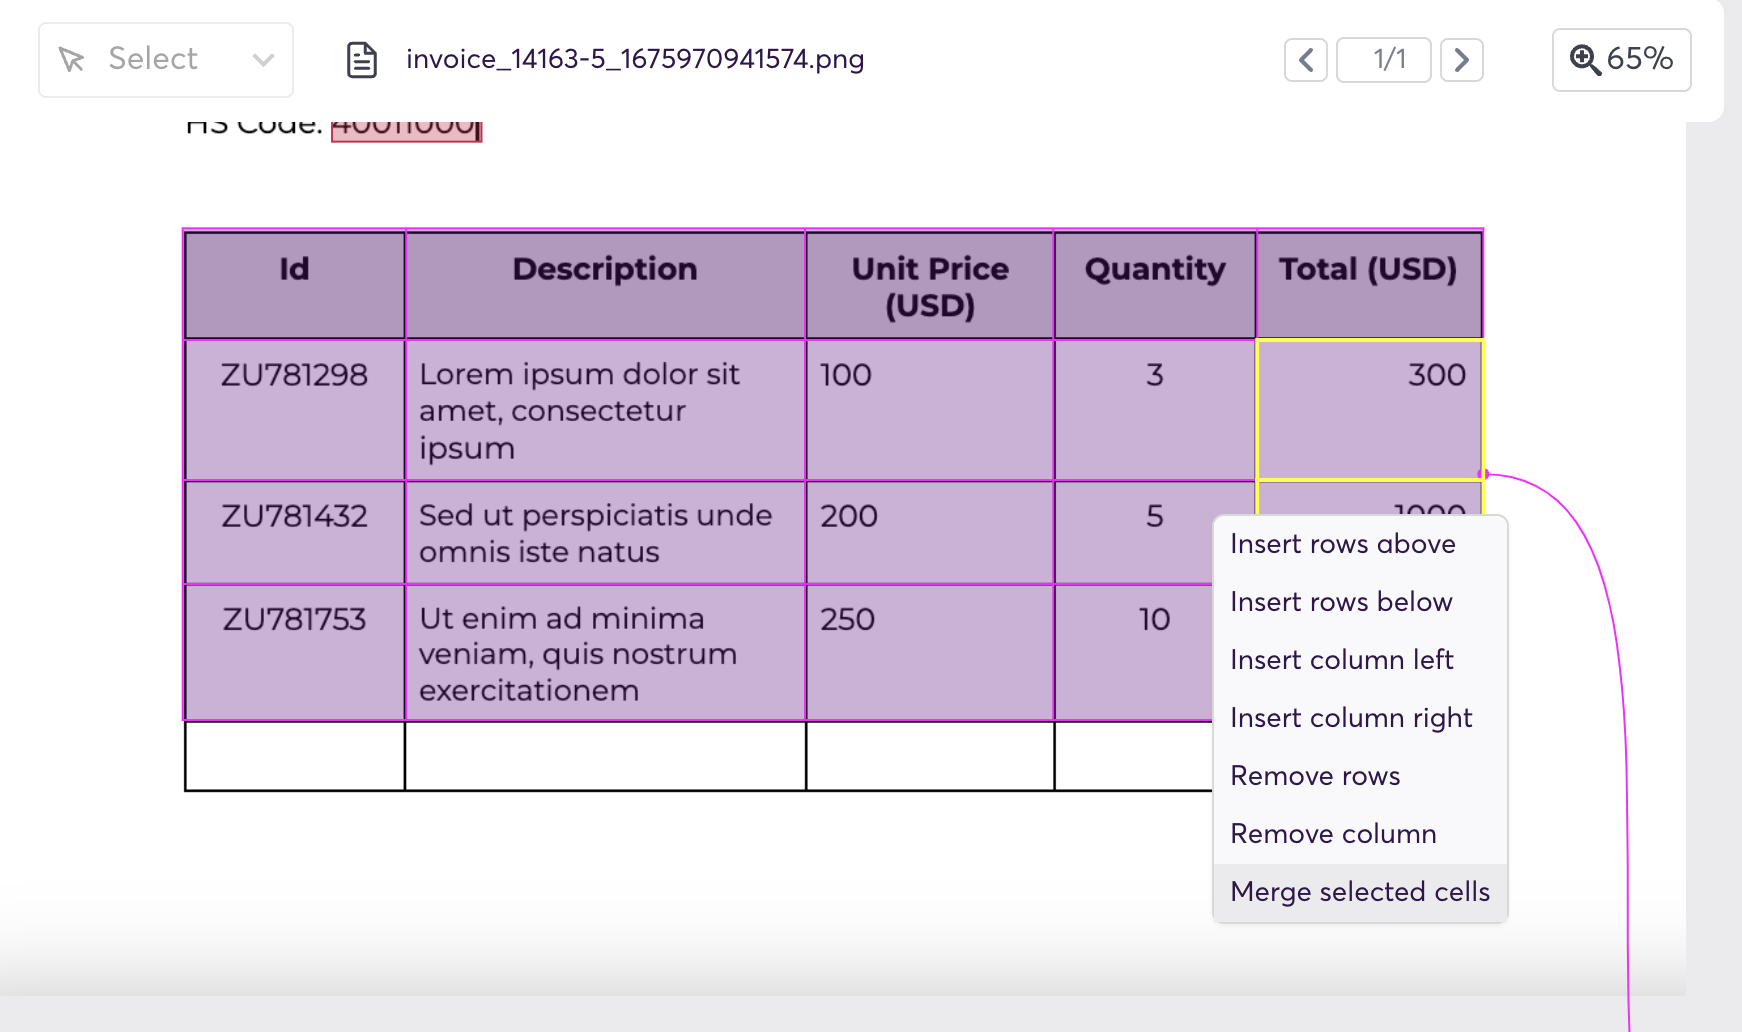
Merging cells
How to merge and split tables
In cases where documents contain tables spanning multiple pages, you can merge two tables by selecting multiple tables of the same field by "ctrl+clicking" ("cmd+clicking" for Mac) on the right panel. You'll see a "merge" icon next to the field name; if you click on it, you'll get a single multi-page table instead of all the selected tables.
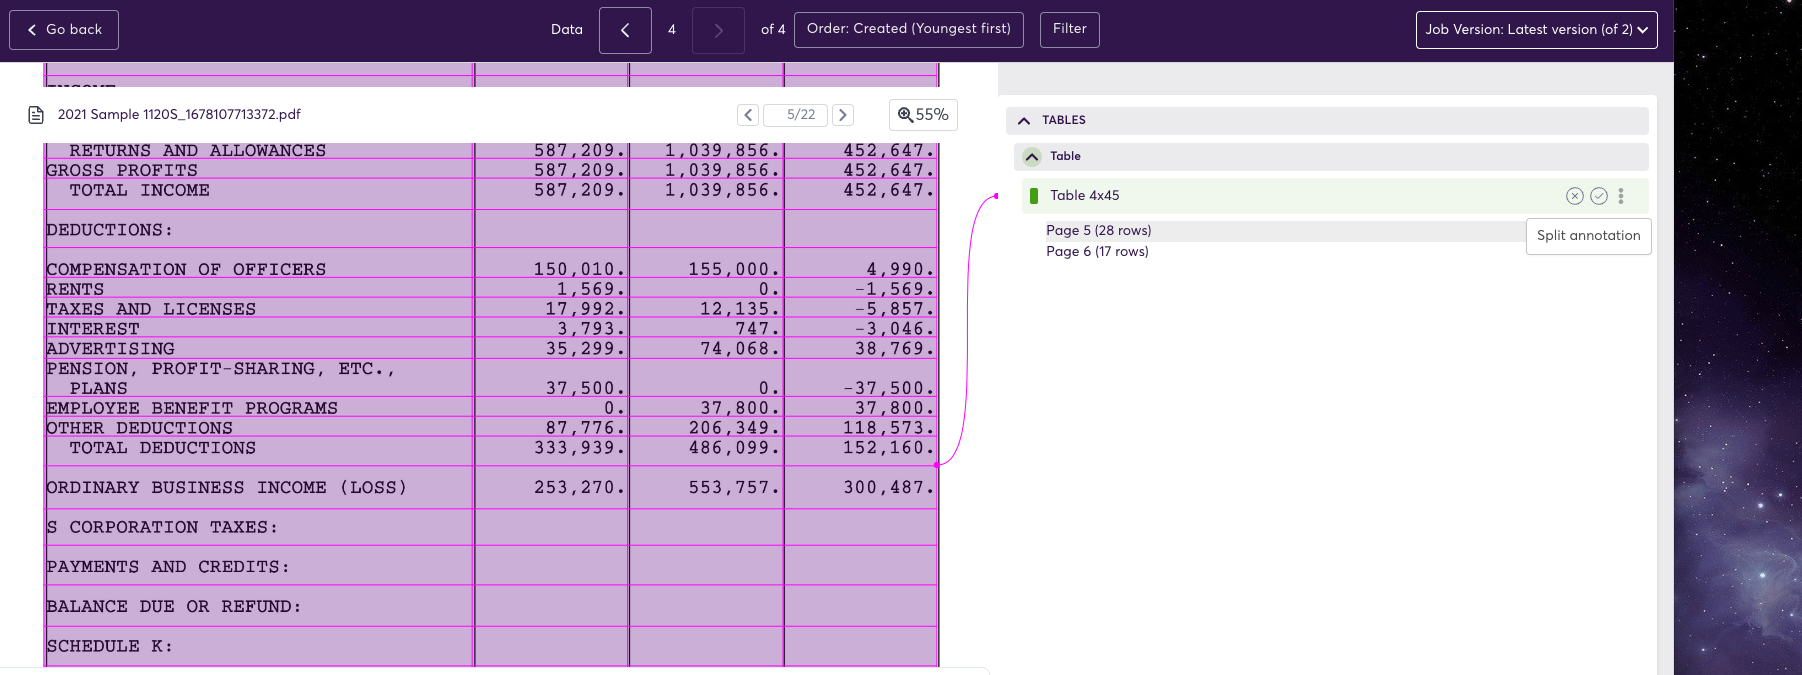
Merge multiple tables into one table
Note that this works only when the number of columns in tables you want to merge is the same (if it's not true, you'll have to go and edit original tables manually). It does work when the header is repeated on each page - and also when it's not.
In case you want to split merged tables, you click on the three dots icon next to this table on the right panel and select "split table" menu item. It will create separate tables for each page.
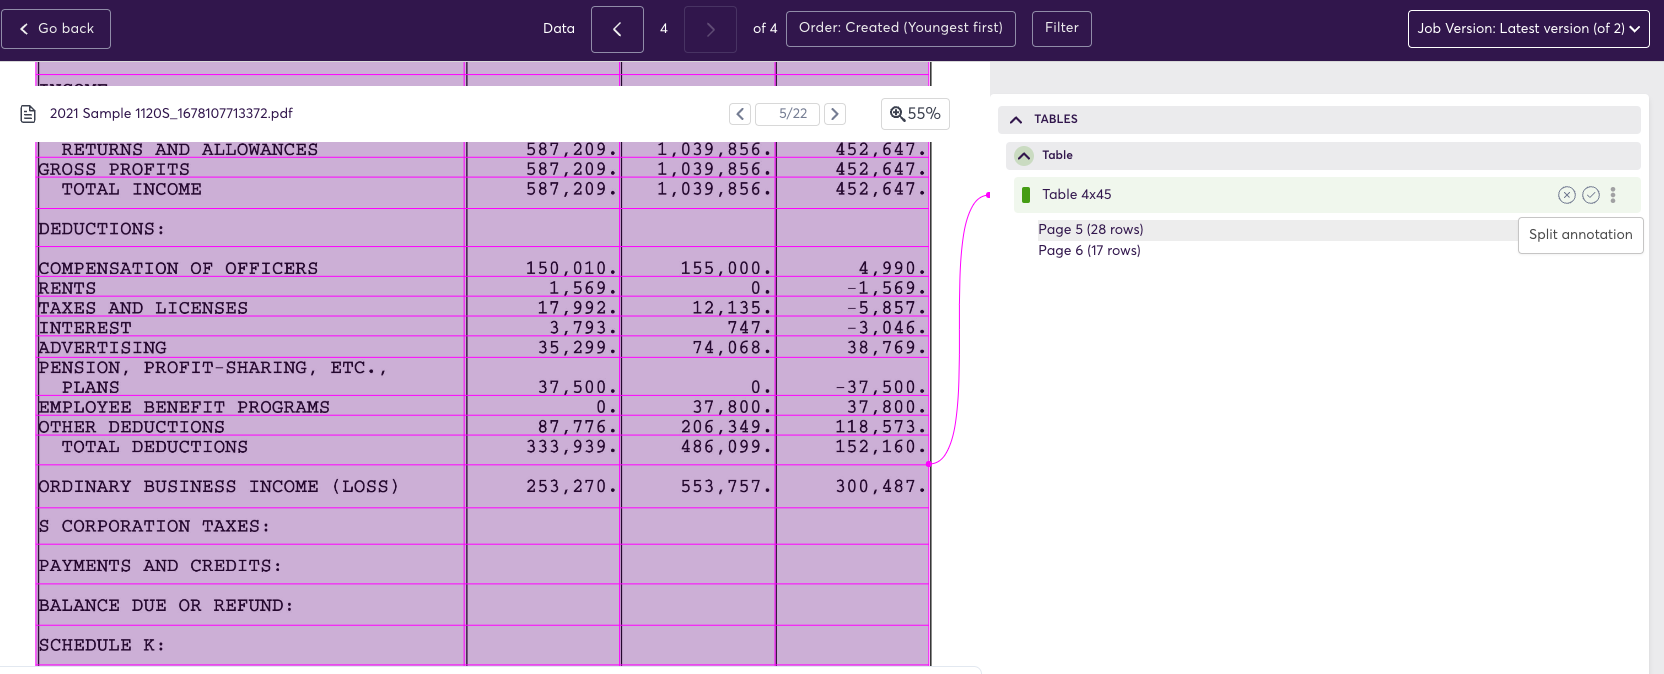
Split table into various tables
Assign or change a table-key to/for a table
In case you want to assign or change a table-key to/for a table, e.g. if the table has not been assigned a correct table-key in the document annotation task or if you have multiple tables to extract, you left-click the table of interest and choose the desired key from the dropdown, and click "done".
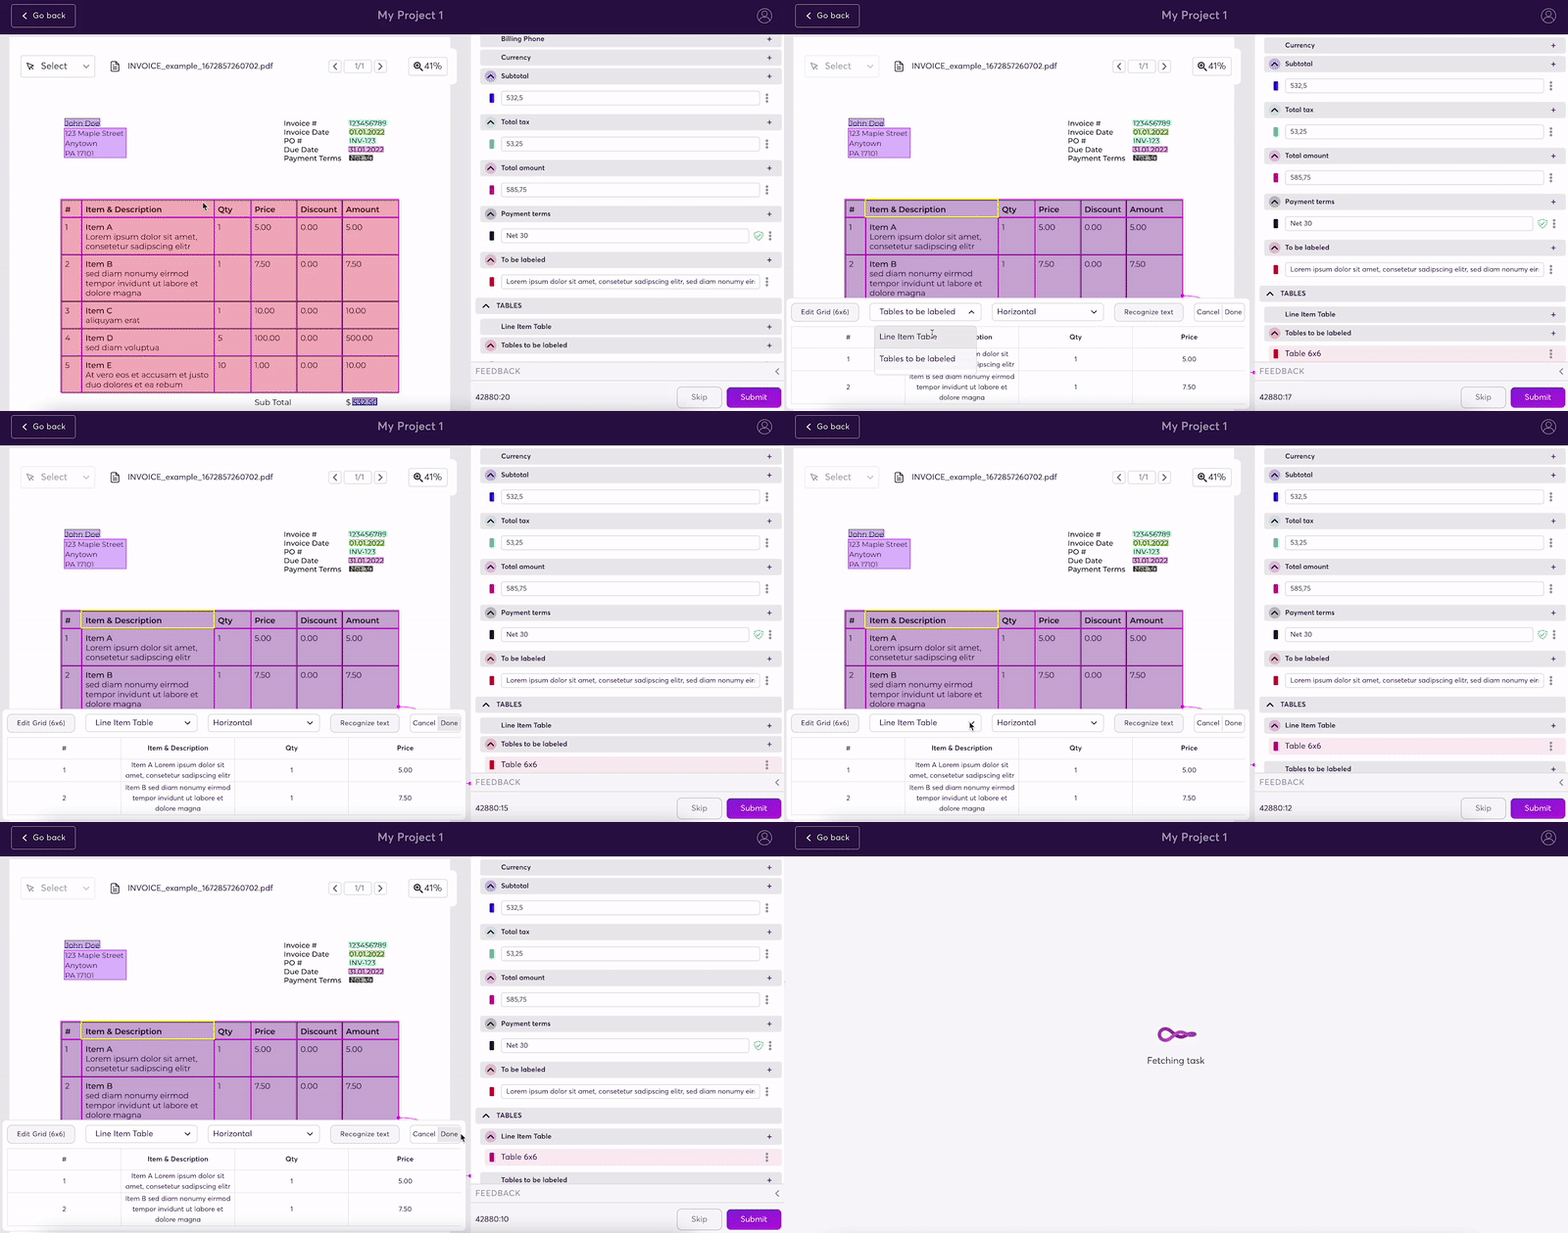
Assign table-keys to tables using the dropdown menu
Only in the Document annotation task:
If a table doesn’t have a table-key, it appears in the “to be labeled” section and you want to choose the correct key from the dropdown.
Add a table
In case you want to add a table, you have one of the following options:
- You choose the table tool on the upper left side, draw a table around the table of interest on the left side (document) and, adjust the layout, choose the correct table-key from the dropdown, and click "done".
- You choose the correct table-key on the right side (key-value pairs list) and move to the + sign next to it to "add a new annotation". Then you draw a table around the table of interest on the left side (document) and, adjust the layout, and click "done".
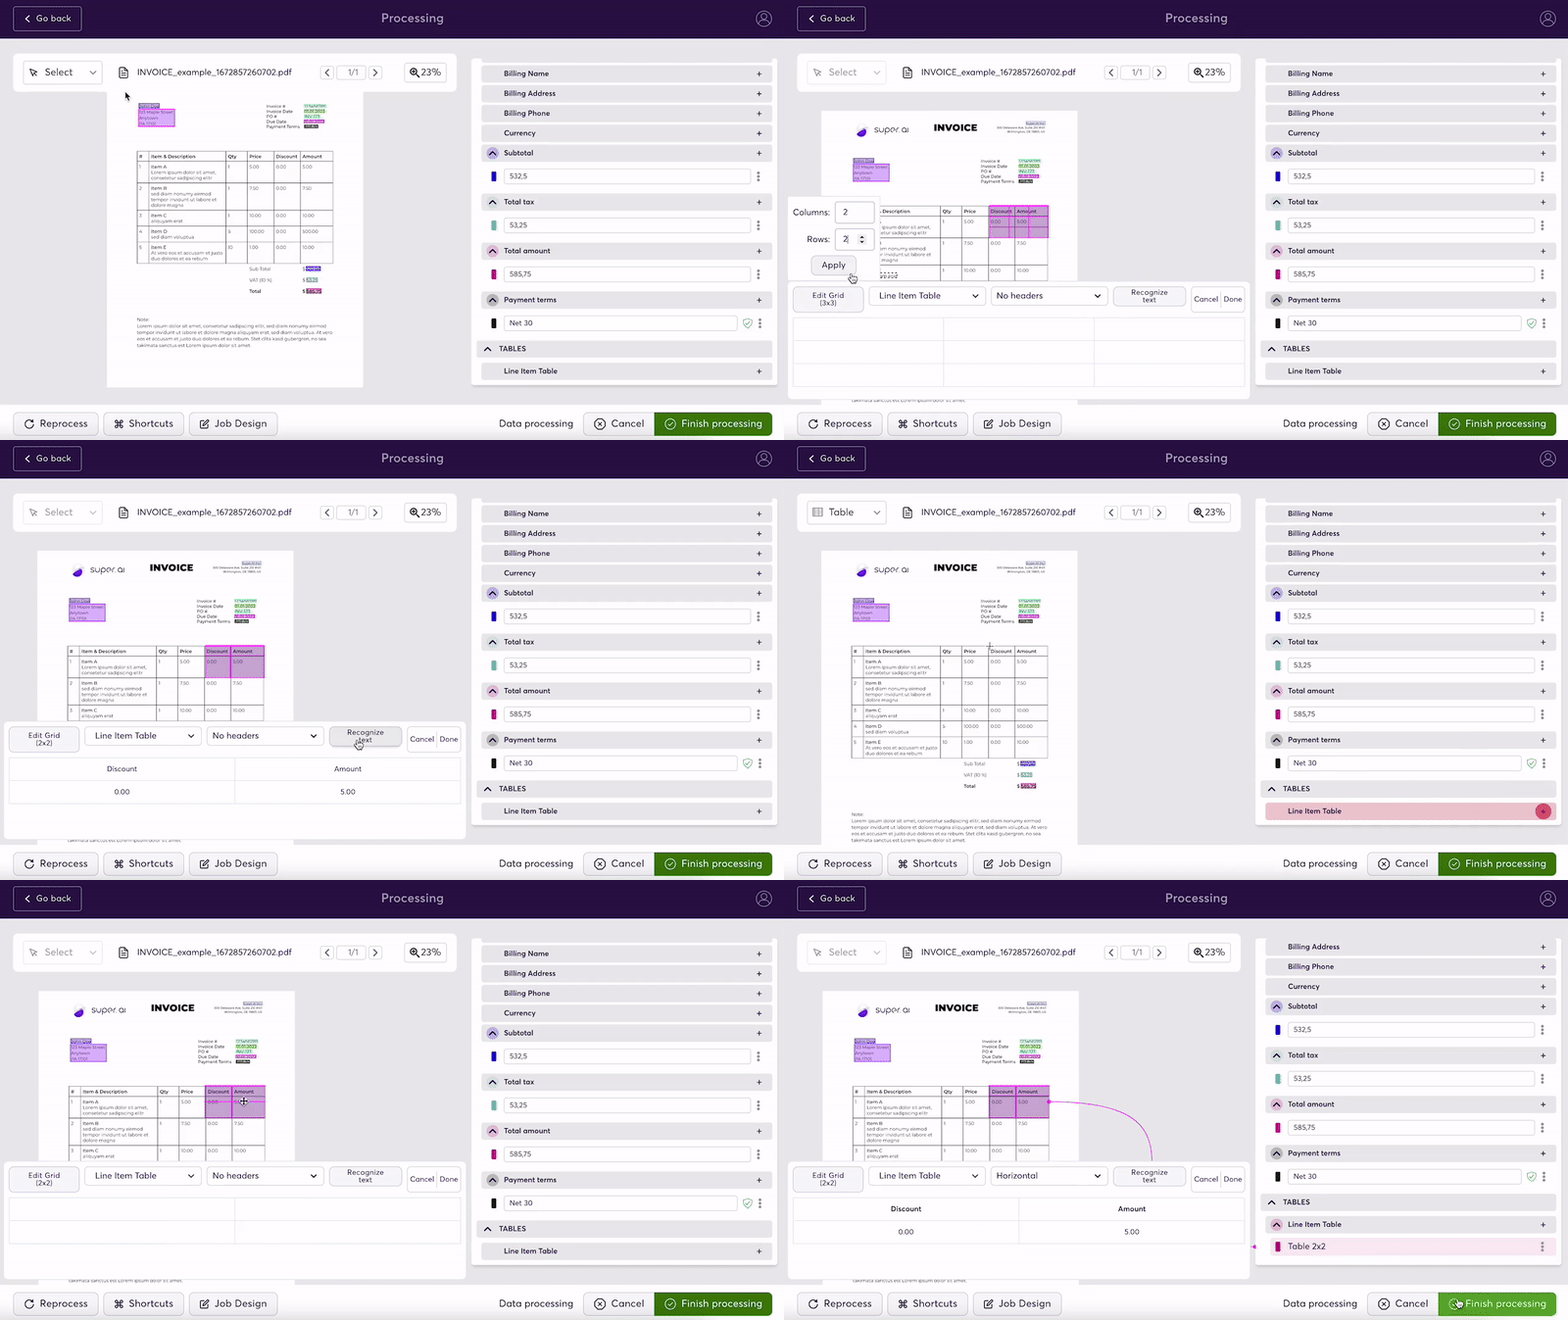
two ways to create (and adjust) a table from scratch
Updated 7 months ago
